GroundSpeak GeoCaching
Geocaching.com is the first geocaching website I used. It appears to be the standard for the majority of Geocachers. Even though there are some alternative sites, GC.com remains on top for now.
Pros
- Free Basic Membership
- Reasonably Priced (US$3 per month or US$30 per year) Premium Membership
- Updated regularly
- Geocache logging and detailed descriptions
- Travel Bug (TB) tracking
- Pocket Queries
- Bookmark Lists
- GPX exports
Cons
- Most useful features are pay-only
- Basic members get only LOC exports
- Some caches are Premium-only
- Virtual and Locationless caches can no longer be added
Tutorial
- Register At Geocaching.com
- Update User Profile
- Find Caches
- Download GPX/LOC Exports
- Log Cache Finds
- Create Bookmark Lists
- Create Pocket Queries
- Track Travel Bugs
1. Register At Geocaching.com
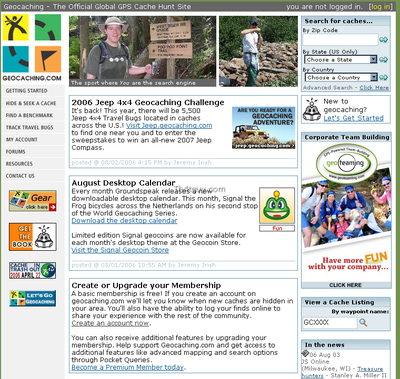
The first step is to browse to Geocaching.com and register your username or team name. Select the "Log In" link at the top right of the screen.
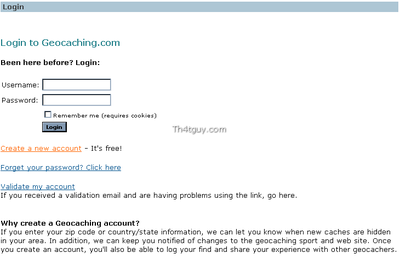
At the Login screen, select "Create New Account."
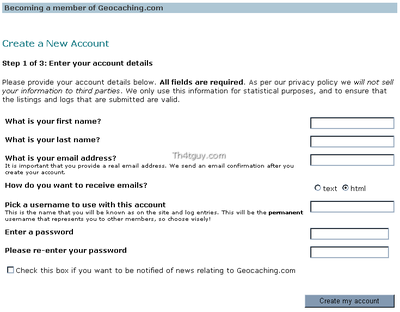
At the "Create New Account Step 1" screen, input the specified details and follow the on-screen instructions. As always, be sure to pick a strong password that is not used for any other websites.
Some individuals prefer to have their own personal name to track stats and interact with the Geocaching community, while other prefer to use team names for their families and/or regular caching groups. Every individual can choose either method, it is truly up to personal preference.
After the toughest part (deciding on user/team name) and the other information is complete, select "Create my account."
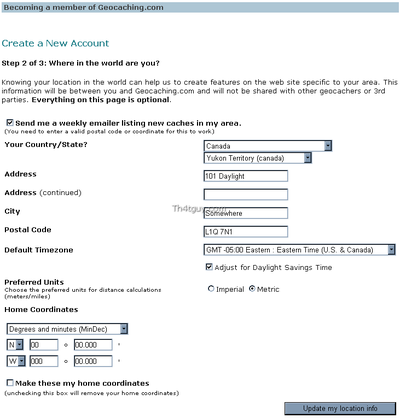
At the "Create New Account Step 2" screen, input the specified details and follow the on-screen instructions. It is highly recommended that each user enter all of this information, especially the "Home Coordinates," and select the "Make these my home coordinates" checkbox. When complete, select "Update my location info."
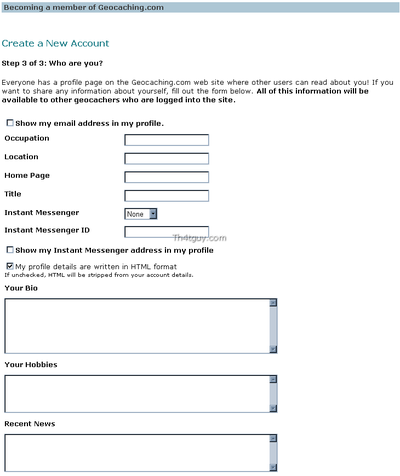
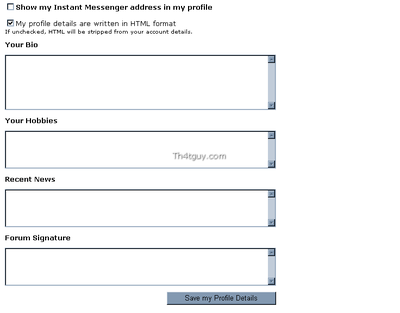
At the "Create New Account Step 3" screen, input the specified details and follow the on-screen instructions. It is highly recommended that at least the "Location," "Bio," "Hobbies," and "Recent News" fields be completed. When all information has been entered, select "Save my profile details."
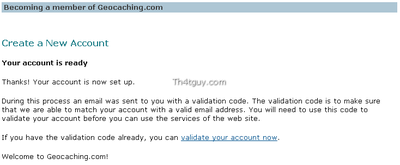
The final step in the process is the "Your account is ready" screen, which explains the activation process. In short, wait a few minutes (sometimes longer) for an email to arrive with an activation code. The email also explains the next step. Either click on the link provided in the email, or click on the "validate your account now" link on the site and enter the code in the email to complete the activation.
Once the account is created and activated, a user is able to start logging cache finds. Some of the advanced features require a Premium membership, which is available at the site for either US$3 per month or US$30 per year. If an individual wants to take advantage of Premium membership features, it is recommended that this process be started sooner than later. The processing of the Premium membership may take several days, so the earlier it is started, the earlier it is completed and the Preimum features are available. It is not fun to sit around for several days and wait for this activation.

To become a Premium member, select the "Become a premium member today" option on the Geocaching.com website and follow the instructions. Note that this will require the input of personal information and either a credit card or paypal transaction. As always, this should be done at your own risk and with reasonable precautions against fraud.
2. Update User Profile
A user's profile at Geocaching.com may contain quite a bit of information, some of which will be public. As always, use caution when posting personal details to a public forum on the internet.
It is highly recommended that each user set their home coordinates. This can enhance the details shown on cache lists and cache details pages by indicating direction and distance from a user's home.
As a courtesy to other users, some small information should be posted as part of a user's profile. Also, some sort of picture or avatar is also a good idea. If privacy is a concern, the picture might be of a pet or an interesting location - even a small piece of artwork for an avatar will work. Anything that helps distinguish one user from another is helpful.
3. Find Caches
There are many ways to find geocaches in any particular area. There are two primary ways which are very quick and easy.
1. Use a zip code search.
2. Use a nearby cache as a starting point.
4. Download GPX / LOC Exports
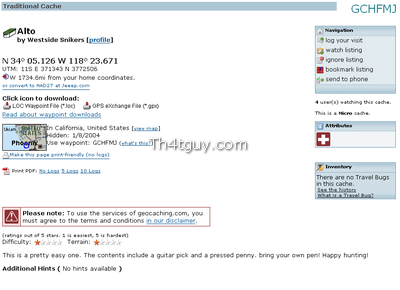
Download data from geocaching.com. In this example screenshot, a random cache was picked. This is the main details screen for the cache. The important part here is the section entitled "Click icon to download."
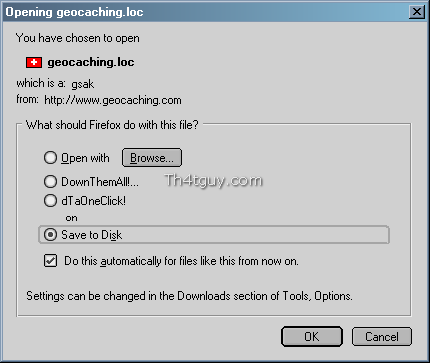 or
or
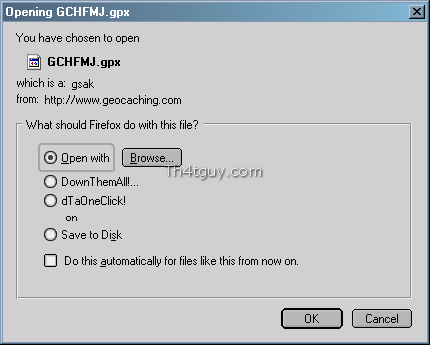
Depending if you are a normal or premium member, you will have either one or two options. Everyone gets the .loc file option, but only premium members get the .gpx option. In either case, a file will be transferred. Either geocaching.loc or {waypoint}.gpx (where {waypoint} is the waypoint abbreviation code for the cache.)
Save this file to a known location on your computer (such as c:\caches) for each cache you want to import.
Note: There is an easier way to get data for multiple caches, but that is the topic of another tutorial.
GPX vs LOC
Why would you care to use GPX over LOC? The answer is the sheer amount of information available in GPX. If you use only LOC, then all you will get is the waypoint, name, and coordinates. With GPX, you get the full description, ratings, hints, and some of the recent logs as well.
I have created a separate tutorial page comparing GPX vs LOC.
5. Log Cache Finds
Once a cache has been found, it needs to be logged. Of course, caches should always be logged in the paper log inside the cache container.
Found logs are the normal logs a user would leave after having found the cache. A short note describing the experience, giving a date/time found, listing what was left and taken, and perhaps noting any issues with the cache are perfectly fine in this type of log. Any individual cache should only be logged as found once.
Not Found (DNF) logs are what a user would leave if they attempted to find the cache, but did not. It is a good idea to leave these any time a real effort is made to find a particular cache, but the cache is not found. Several DNF logs on a particular cache serve as an indicator to the cache owner that something may have happened to the cache.
Note logs are used to convey information that is not linked directly to a Found or a DNF. Sometimes they are updates from the cache owner, question from finders, or a follow up (any find after the first) find by a cacher.
Needs Maintenance logs are somewhat more urgent requests to the cache owner that the cache is in an unusable state. This indicates, for example, that the log book is full or missing, or that the cache was found open and scattered several yards away from its spot. Users should use this log type only when the situation warrants.
6. Create Bookmark Lists
A bookmark list is a collection of caches on the site. This has several uses, from sharing favorite caches to lining up the next caches a particular cacher is planning to accomplish.
7. Create Pocket Queries
A Pocket Query is a way of automatically exporting GPX files from the site in order to import them into another application and/or device.
8. Track Travel Bugs
A Travel Bug (TB) is an interesting item that most cachers will eventually encounter. Each TB has a tracking number imprinted into it. By enterting this number into the website, a find can be logged and the owner of the TB will be notified of the new status of the item.
Finding a TB.
Logging a TB.
Buying your own TB.
Dropping off a TB.
Screen Shots
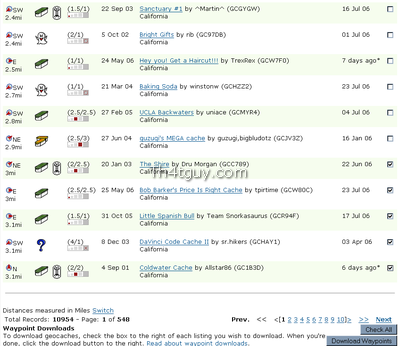 GeoCaching Waypoints |
 CacheMate Delete Voice Notes |
 CacheMate Cache Edit Info |
 CacheMate Cache Edit Info2 |
Hardware
Current
- Dell Axim X50v PocketPC PDA
- DeLorme Earthmate BlueLogger BT GPSr
- Gomadic Window PDA Mount
Historical
- Compaq iPAQ H3900
- Navman GPS Sleeve